
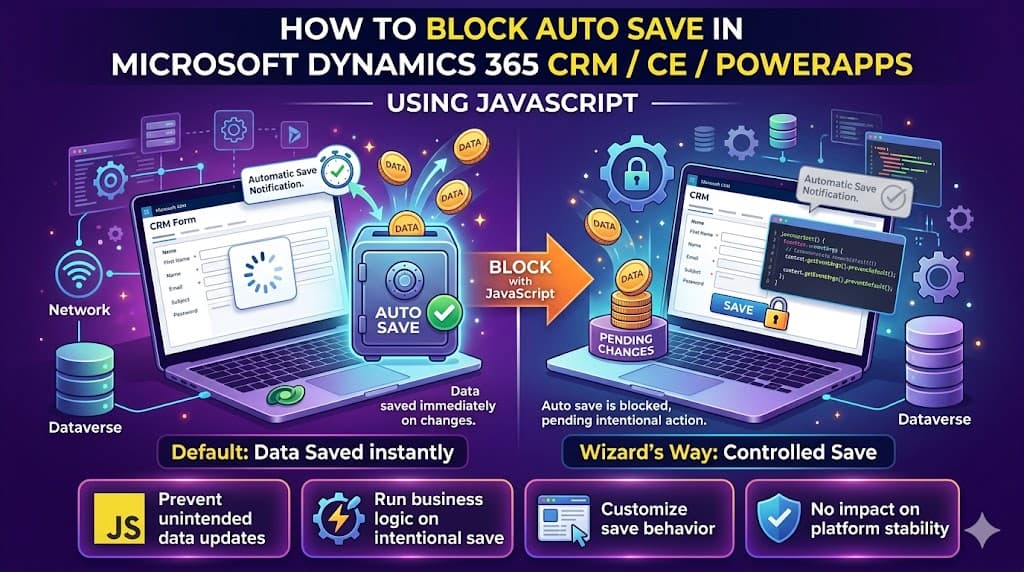
How to Block Auto Save in Microsoft Dynamics 365 CRM / Dynamics CE / PowerApps Using JavaScript
Learn how to block Auto Save in Microsoft Dynamics 365 Customer Engagement (CE) using JavaScript.
A seasoned Techno-Functional Professional with 7+ years of experience in Information Technology (IT), specializing in Microsoft Dynamics 365 Customer Engagement (CE) and Power Platform Solutions. I bring extensive expertise in out-of-the-box and custom configurations, customizations, integrations and data migrations. My skill set includes proficiency in working with Model Driven Apps, Canvas Apps, Power Pages (formerly Power Portals), Power Automate, Approval flows, Code Activities, Plugins, Workflows, Business Rules, JavaScript, HTML Web Resources, PCF Controls, Chatbots, SSRS Reports, Microsoft Copilot, Azure OpenAI, Azure Web Services, Azure Functions, Azure Logic Apps, Blazor Web Assemblies, C# and requirement analysis.
Auto Save in Microsoft Dynamics 365 Customer Engagement (CE) can be useful, but there are many business cases where it becomes a problem.
You may need to block auto save when:
A Canvas App or dialog is collecting additional data
Auto-save triggers Power Automate flows too early
Required fields are not yet filled
You want to force users to save manually
Background saves cause inconsistent or incomplete updates
In such situations, blocking auto save across the form—or only under specific conditions—can prevent unwanted logic from running prematurely.
Why Auto Save Can Cause Problems
Dynamics CE automatically performs a save every 30 seconds and during certain background operations.
This can cause issues like:
Power Automate flows firing without required data
Incomplete values (like file names) passed to plugins
Business rules executing too early
Canvas App dialogs submitting half-filled records
To avoid these issues, you can stop auto-save using JavaScript.
JavaScript Code to Block Auto Save
Here is the core script:
function blockAutoSave(eContext) {
    var saveEvent = eContext.getEventArgs();
    if (saveEvent.getSaveMode() === 70 || saveEvent.getSaveMode() === 2) {
        // autosave or background save
        saveEvent.preventDefault();
    }
}
Three Ways to Use This Script
Dynamics CE gives you complete flexibility depending on your scenario.
Option 1: Block Auto Save Permanently for the Form
Attach only the function blockAutoSave to the form’s On Save event.
This will:
Block auto-save for the entire form
Allow manual Save to work normally
Steps:
Open the Form Editor
Go to Form Properties
Add your JS Web Resource
Add event handler under "On Save":
Function name:
blockAutoSaveCheck Pass execution context
Publish
This option is ideal when an entity should never auto-save (e.g., Cases, custom entities with complex logic).
Option 2: Block Auto Save Only in Specific Scenarios
You can call:
formContext.data.entity.addOnSave(blockAutoSave);
This allows you to block auto save only when needed, for example:
When your Canvas App dialog is open
When required fields are empty
When a specific flag or checkbox is true
When the user executes a ribbon button action
This gives you more control because you decide when auto save should be blocked.
Option 3: Dynamically Add or Remove the Auto-Save Blocker
You can also enable or disable the blocker during runtime based on conditions.
Add the blocker
formContext.data.entity.addOnSave(blockAutoSave);
Remove the blocker
formContext.data.entity.removeOnSave(blockAutoSave);
⚠ Important
The function reference must be exactly the same.
This works:
formContext.data.entity.removeOnSave(blockAutoSave);
This does NOT work:
formContext.data.entity.removeOnSave(function(e){ ... }); // new function reference
Example: Enable or Disable Auto-Save Based on a Field Value
function onLoad(eContext) {
    var formContext = eContext.getFormContext();
    var isBlockingEnabled = formContext.getAttribute("new_enableblock").getValue();

    if (isBlockingEnabled === true) {
        // Block auto-save
        formContext.data.entity.addOnSave(blockAutoSave);
    } else {
        // Allow auto-save
        formContext.data.entity.removeOnSave(blockAutoSave);
    }
}

function blockAutoSave(eContext) {
    var saveEvent = eContext.getEventArgs();
    if (saveEvent.getSaveMode() === 70 || saveEvent.getSaveMode() === 2) {
        saveEvent.preventDefault();
    }
}
This is extremely useful when you want fine-grained control.
SaveMode Values Used in This Script
Dynamics 365 CE uses different Save Modes to indicate why a save was triggered. When your JavaScript OnSave event handler executes, you can inspect the Save Mode to decide what should happen.
Below are the relevant codes used when blocking auto save:
| Save Mode | Name | Description |
|---|---|---|
| 2 | Auto Save | Triggered every 30 seconds or when Dynamics performs its default auto-save behavior. This is the most common unwanted save, often happening before required fields are populated or before the user is ready. |
| 70 | Background Save | A system-triggered save that happens during operations such as navigating away from a form, closing a record, switching tabs, or performing actions that require the form data to be committed. This save often behaves similar to auto save but is not user-initiated. |
Why These Two Save Modes Are Blocked
These two modes—2 (Auto Save) and 70 (Background Save)—are the ones that Dynamics triggers without the user manually clicking Save, Save & Close, or Save & New.
Blocking them ensures that:
Unfinished or partial data does not get saved
Power Automate or plugin logic is not triggered prematurely
Canvas App dialogs or additional UI components can work safely without the system trying to commit changes
Users maintain control of when the record is saved
What Is Not Blocked
Your script does not block:
Manual Save (Save Mode 1)
Save & Close
Save & New
Script-triggered save operations (unless you explicitly check for them)
This ensures that users can still save the form normally—only auto or background saves are prevented.
By filtering only on Save Modes 2 and 70, the script provides protection from unwanted auto-saves while still allowing users to save intentionally.
This approach keeps the system predictable, prevents accidental triggers, and gives full control back to the user or your custom logic.
Step-by-Step Setup
1. Create a JavaScript Web Resource
Go to Advanced Settings → Customizations → Solutions
Add a new JS Web Resource
Paste the script
Save and publish
2. Add the Script to Your Form
Depending on which option you choose, attach:
Only the function (
blockAutoSave)Or call
addOnSave()dynamicallyOr add/remove the event based on conditions
Conclusion
With a small amount of JavaScript, you gain full control over how data is saved in Microsoft Dynamics 365 CE.
You now have three powerful techniques:
Block auto save permanently for the entire form
Block auto save only in specific scenarios
Add or remove the auto-save blocker dynamically, based on real-time conditions
This prevents accidental triggers, incomplete data saves, and unwanted flows—keeping your system stable and predictable.